Welcome to the Toyota Sewing Machine User Manual! This guide provides essential insights for setup, operation, maintenance, and troubleshooting, ensuring optimal performance for all your sewing needs.
Understanding the Importance of the User Manual
The Toyota Sewing Machine User Manual is your comprehensive guide to mastering your machine. It provides detailed instructions for setup, operation, and maintenance, ensuring safe and efficient use. By following the manual, you can troubleshoot common issues, optimize performance, and explore advanced features. It’s essential for both beginners and experienced users to maximize their sewing experience and maintain the machine’s longevity effectively.
Key Features of Toyota Sewing Machines
Toyota sewing machines are renowned for their versatility, efficiency, and durability. They offer advanced stitching options, specialized presser feet for various fabrics, and easy-to-use controls for stitch length and tension. Many models include features like automatic threading, adjustable presser foot pressure, and customizable settings to cater to diverse sewing needs, enhancing creativity and productivity for both beginners and experienced sewists.
Safety Precautions and Initial Setup
Always turn off the machine before threading or changing needles. Ensure a stable setup, avoid loose clothing, and keep children away. Handle sharp objects carefully for safe operation.
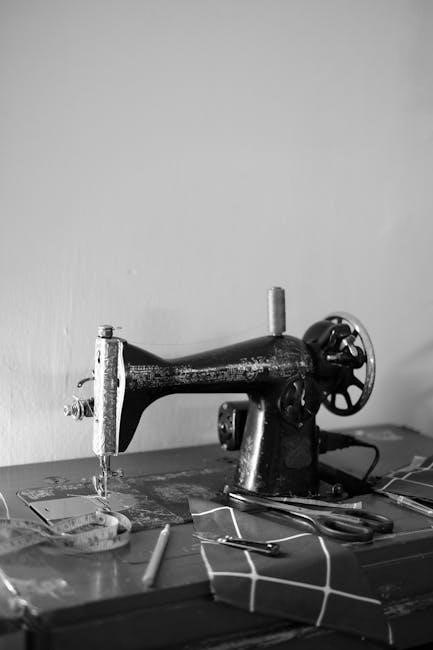
Unpacking and Preparing the Machine
Start by carefully unpacking your Toyota sewing machine, ensuring all components are intact. Check for any visible damage and verify the inclusion of accessories like needles, bobbins, and the power cord. Locate the user manual for initial guidance. Before use, clean the machine gently with a soft cloth and apply a few drops of sewing machine oil to moving parts. Plug in the machine, test it with a scrap fabric piece, and ensure it operates smoothly.
Basic Safety Guidelines for Operation
Always turn off the machine before threading, cleaning, or making adjustments. Keep loose clothing and long hair tied back while sewing. Ensure children are supervised when near the machine. Avoid sewing over pins to prevent damage or injury. Never touch moving parts with your hands or objects. Use the correct needle type for your fabric to avoid breakage. Follow these guidelines to ensure safe and effective operation of your Toyota sewing machine.

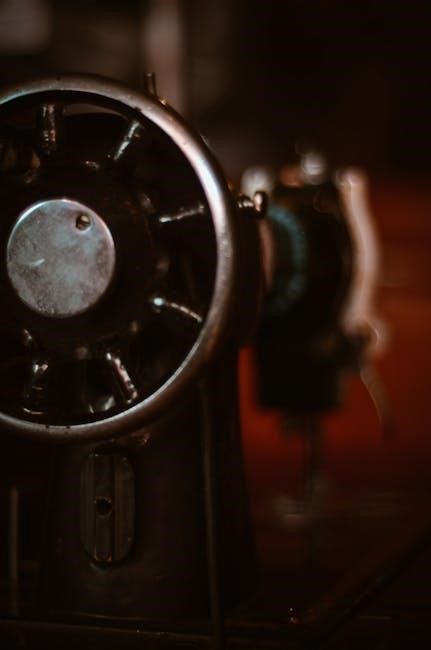
Understanding the Machine Components
Understanding your Toyota sewing machine’s components is crucial for effective use. Familiarize yourself with the power switch, hand wheel, control panel, presser foot, and fabric feed dogs to ensure smooth operation.
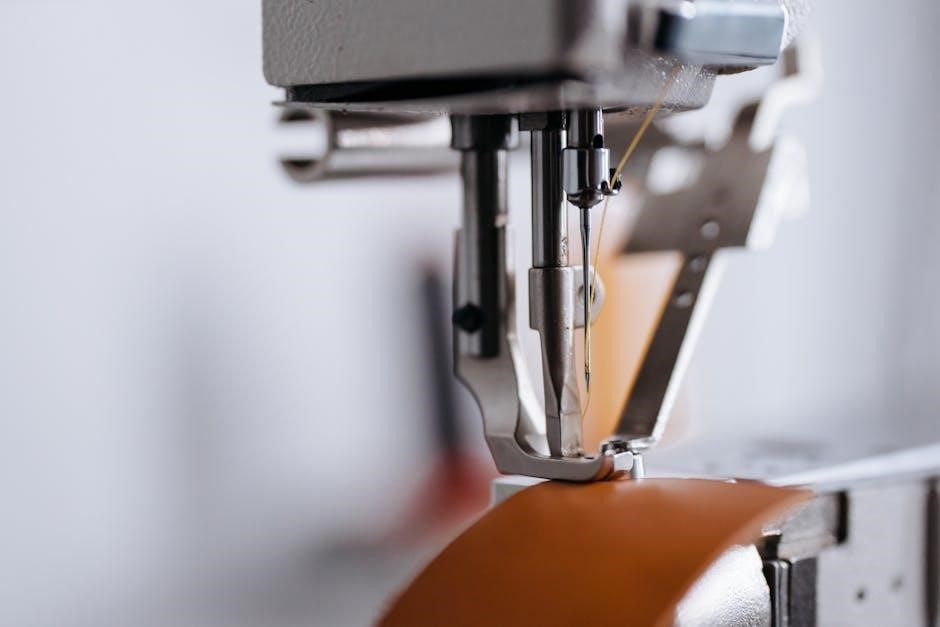
Identifying the Main Parts of the Toyota Sewing Machine
The Toyota sewing machine features key components like the control panel, stitch selection dials, presser foot, handwheel, and power switch. The control panel displays stitch options, while the dials adjust settings. The presser foot secures fabric, and the handwheel controls needle movement. Understanding these parts ensures efficient operation and helps you utilize the machine’s full potential for various sewing tasks.
Functions of the Control Panel and Dials
The control panel on your Toyota sewing machine allows you to select stitch patterns and adjust settings easily. The dials enable precise control over stitch length and tension, while the LED display shows your current settings. These features work together to help you customize your sewing experience, ensuring accurate and professional results for every project.
Threading and Stitch Settings
Threading and stitch settings are crucial for smooth operation. Proper threading ensures consistent stitches, while adjusting length and tension customizes your sewing experience for optimal results.
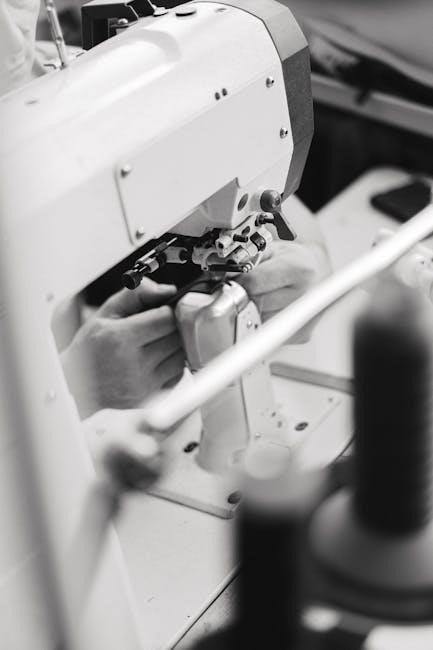
Step-by-Step Guide to Threading the Machine
Start by turning off the machine and ensuring all parts are clean. Locate the spool pin and gently pull the thread through the tension discs. Guide the thread through the take-up lever and needle bar, ensuring it’s seated properly. Insert the needle, leaving a small loop, and pull gently to secure. For the lower thread, lift the presser foot and draw the bobbin thread through the machine’s stitch plate. Always refer to the manual for specific model instructions.
Adjust the tension dial as needed for smooth stitching. Test the thread by sewing a few stitches on scrap fabric to ensure even tension and proper needle alignment. Regularly check and rethread if necessary to maintain consistent results.
Adjusting Stitch Length and Tension
To adjust the stitch length, locate the stitch length dial, typically found on the front or top of the machine. Turning the dial clockwise increases stitch length, while counterclockwise decreases it. Test these adjustments on scrap fabric to observe the changes. For tension, find the tension dial near the bobbin area; turning it adjusts the tightness of the stitches. Proper tension prevents puckering or loose stitching. Ensure to balance upper and lower tensions for consistent results, and refer to the manual for specific guidance on different fabrics and threads. Regular testing on scrap fabric helps achieve optimal settings for various sewing projects.
Basic Sewing Operations
Master the fundamentals of sewing with your Toyota machine by understanding basic operations, starting with proper setup and thread guidance. Ensure the machine is turned off before threading or adjusting needles. Always test stitch settings on scrap fabric to achieve desired results. Familiarize yourself with stitch patterns and fabric compatibility for smooth operation.
Starting Your First Sewing Project
Gather your fabric, thread, and needles. Ensure the machine is turned off before threading. Follow the manual’s threading guide to avoid tangles. Set the stitch length and tension according to fabric type. Test stitches on scrap fabric before sewing your project. Select the appropriate stitch pattern for your fabric. Keep loose clothing tied back and ensure the work area is clear. Start sewing slowly, guiding fabric smoothly under the presser foot.
Using Different Stitch Patterns and Feet
Select the desired stitch pattern using the control panel or dials. For zippers or heavy fabrics, use the appropriate presser foot. Attach specialized feet like quilting or zipper feet by snapping them onto the machine. Adjust stitch length and tension based on fabric type. Test stitches on scrap fabric before sewing. Guide fabric evenly under the presser foot, maintaining consistent speed for professional results.
Troubleshooting Common Issues
Identify stitching or thread breakage issues by checking tension and thread alignment. Regularly clean and oil the machine to prevent mechanical issues. Refer to the manual for solutions.
Diagnosing and Solving Stitching Problems
Stitching issues often arise from incorrect tension settings or improper threading. Check the bobbin and upper thread alignment. Ensure the needle is correctly installed and not damaged. If skipped stitches occur, inspect the presser foot pressure and fabric type. Refer to the manual for guidance on adjusting settings and resolving common stitching errors effectively.
Resolving Tension and Thread Breakage Issues
Thread breakage and tension problems can disrupt sewing. Check the thread path for tangles or blockages. Ensure the bobbin is correctly seated and threaded. Adjust tension dials to balance upper and lower thread flow. If thread breaks frequently, inspect for sharp edges or debris. Use high-quality thread and replace the needle if damaged. Regularly cleaning and lubricating the machine can also prevent such issues.
Maintenance and Cleaning
Regularly clean the machine by removing dust and debris. Lubricate moving parts to ensure smooth operation. Check for blockages and inspect for wear or damage.
Regular Maintenance Tips for Optimal Performance
Regularly clean dust and debris from the machine to prevent blockages. Lubricate moving parts as specified in the manual to ensure smooth operation. Check for wear or damage on needles and belts, replacing them when necessary. Oil internal components periodically to maintain efficiency. Always refer to the user manual for specific maintenance schedules and guidelines tailored to your Toyota sewing machine model.
Cleaning the Machine and Lubricating Parts
Turn off the sewing machine and unplug it before cleaning. Use a soft brush to remove dust and lint from visible areas. Regularly oil the internal mechanisms as outlined in the manual to prevent friction. Clean the bobbin area thoroughly and check for thread scraps. Lubricate moving parts periodically to ensure smooth operation. Always refer to the manual for specific cleaning and lubrication instructions tailored to your Toyota sewing machine model.
Accessories and Optional Features
Explore a wide range of accessories, including specialized presser feet, extension tables, and custom stitch patterns. Optional features like automatic threaders and additional storage cases enhance functionality and personalize your sewing experience.
Exploring Additional Accessories for Enhanced Sewing
Discover a variety of accessories designed to enhance your sewing experience. From specialized presser feet for quilting and heavy-duty fabrics to extension tables for larger projects, these tools expand your machine’s capabilities. Custom stitch cards, additional bobbins, and carrying cases are also available, ensuring you have everything needed for diverse sewing tasks. Explore authorized dealers or online stores to find the perfect additions for your Toyota sewing machine.
Upgrading or Customizing Your Machine
Upgrading or customizing your Toyota sewing machine can enhance its performance and adapt it to your specific needs. Consider adding custom stitch patterns or specialized feet for unique fabrics. Software updates may also be available to expand functionality. Consult authorized dealers for genuine parts and ensure compatibility. Customization allows you to tailor your machine for quilting, embroidery, or heavy-duty tasks, making it a versatile tool for all your sewing projects.
Advanced Sewing Techniques
Welcome to the advanced sewing techniques section! Explore quilting, heavy-duty projects, and specialized fabric handling. Master expert tips for precise stitching and professional finishes.
Mastering Quilting and Heavy-Duty Sewing
Master quilting and heavy-duty sewing with Toyota machines. Use specialized feet for precise seam allowances and thick fabrics. Adjust stitch length and tension for optimal results. Ensure proper thread quality and fabric alignment. Regularly clean and lubricate the machine after heavy use. Explore advanced settings for professional finishes. Handle thick materials effortlessly with the right techniques and tools.
Using Specialized Feet for Various Fabrics
Toyota sewing machines offer specialized feet for various fabrics, enhancing sewing accuracy. The quilting foot is ideal for thick fabrics and precise seam allowances. Use the zipper foot for tight spaces and the walking foot for heavy materials. Adjust stitch settings to match fabric thickness. Consult the manual for specific foot compatibility and tips on achieving professional results for any fabric type.
Additional Resources and Support
Explore repair services, genuine parts, and online forums for Toyota sewing machines. Join communities to share tips and solutions, ensuring your machine runs smoothly and efficiently always.
Where to Find Repair Services and Parts
Authorized Toyota dealers and official websites offer genuine parts and repair services. Online forums and communities provide valuable resources, peer support, and solutions for common issues. Ensure to use certified parts for optimal performance. Troubleshooting guides and expert advice are also available through these channels, helping you maintain your machine effectively. Always verify the authenticity of parts to avoid compromising your sewing machine’s quality and functionality.
Online Communities and Forums for Toyota Sewing Machines
Online communities and forums dedicated to Toyota sewing machines are invaluable resources for troubleshooting, tips, and peer support. These platforms connect users worldwide, offering advice on maintenance, repairs, and creative projects. Members share experiences, solutions, and techniques, fostering a collaborative environment. Whether you’re a novice or an expert, these forums provide a wealth of knowledge to enhance your sewing skills and resolve common issues effectively.